Showing posts with label Tutorial. Show all posts

Monday, February 23, 2015

Custom Type Tutorial


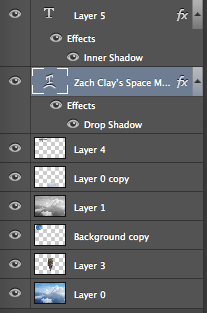
In this tutorial we had to follow a tutorial to make our name blend together. We will also be able to use this tutorial for our title on our movie posters that we are making. I used a custom font and what I did to make it my own was expand out the letters and then also changed the spacing between some of the letters. I also lined up the l and the h so it made it look like one long line and I thought it looked pretty cool too. 

Thursday, November 13, 2014

Floating Mountain


We started this "Floating Mountain" project by learning about "Pixel fringe" and how you can get rid of it so that you can make images look good. The first thing I had to do to complete this project was to find and extract a picture of a mountain. The next thing I had to do was set the mountain image to a new "sky background". Then I had to extract 2 more images and add them onto my Mountain image. I chose my the spaceship and the big moon because I wanted to go for a "futuristic"feel, which the spaceship showed. And the moon represented that the floating mountain was kind of out of this world.
In this project, I learned how to use the "Quick Selection Tool" to select the part of the image I want and add them into another background. I also found that it was kind of hard to put the mountain behind the first cloud, but I eventually learned to add that to the layer above the mountain so it all worked out.
If I could do this project again, I would try to blend the mountain and the images better. I would've also liked to make the moon look like it was behind all of the clouds, instead of it being sort of in front of the clouds. I would keep the images the same, because I like what they represented, like it was futuristic and from a different world.
I can enhance the next project I do with this because I now know more shortcut tools, Like "W" is the quick selection tool, which can help me extract more images. I also will know how to blend more images.
Overall, I liked this project and I thought that it taught me a lot about the "Photoshop" program, like how you can be very creative with what you post, and the possibilities can be endless.

Monday, November 3, 2014

Sphere Tutorials


In this project, we had to search up a sphere tutorial for Photoshop and Illustrator.
I started out this project by googling tutorials for both programs, then I decided which one would look the best. Then once I finished, I turned it in on my blogger site. 
3 things that are different between the 2 programs are that Photoshop is a bit map, and Illustrator is a vector, Photoshop uses filters while illustrator uses effects, and photoshop saves as a .jpg or .png and Illustrator saves as a PDF.
Ine the Illustrator tutorial, I learned how to put symbols on objects that I create, and on the photoshop tutorial I learned how to add different layers onto an object so it looks like a sphere.
I need to learn more about all the other different tools, so that I can become more familiar with the programs. 
The sites I used were http://ibrandstudio.com/tutorials/how-to-create-3d-ball-in-photoshop
and http://pixelrockit.com/create-stylish-3d-shapes-with-adobe-illustrator/

Friday, October 3, 2014

Logo Tutorial


This was a logo I made doing a tutorial. I chose to do this particular tutorial because I thought that the logo looked fun, but also kind of challenging. While doing the tutorial, I learned how to put a pattern on the text and I also learned how to make a cool looking 3-D text. On my actual logo, I will use a different color scheme and also do a different design. I think I did well making the lightning bolt and also making the text.

Friday, August 29, 2014

Pencil Practice

In this project, we started out making a generic pencil and pencil bucket, using instructions that our teacher gave us. Then our next step was to make a creative pencil, which included making different sized pencils and buckets. The last part of our project was to make 2 complimentary objects.
      My 3 biggest takeaways from this project are learning how to use illustrator to make objects, learning all the shortcuts that are needed to use different tools in illustrator, and finally, learning how to make each individual thing in my project, like the seams in the baseball I made.